
Post
How to set up a VPN on Ubuntu: clients, profiles and checks
How to set up a VPN on Ubuntu: clients, profiles and checks. Source-based analysis of current documented access, limitations, app controls and payment conditions, without invented tests or ratings.
In this article

Setting up a VPN on Ubuntu begins with choosing the correct client for the service you already intend to use. An employer’s remote-access connection, a commercial privacy service and a VPN server you administer are different projects. Installing an application does not create an account on a server, and entering a gateway address without the required credentials does not grant access.
This guide explains an Ubuntu desktop client workflow, with GNOME’s network settings and Proton VPN’s current Linux documentation as concrete examples. It was researched on 31 October 2026; we have not performed a new installation or benchmark. The examples do not establish that every Ubuntu release, desktop environment, VPN protocol or provider follows identical steps. Our Linux VPN buying guide addresses provider selection separately.
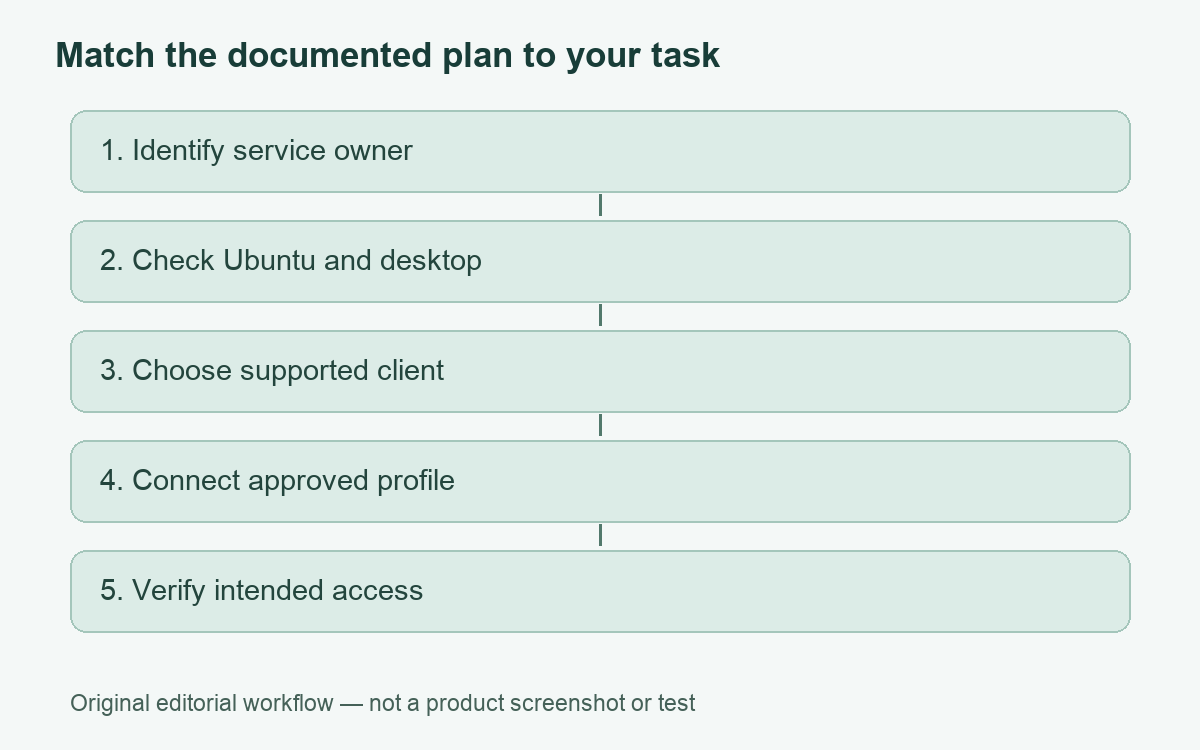
Choose the installation route before changing settings
There are two common routes: a provider’s supported application, or a connection managed through the desktop’s network settings. The application may expose provider features that a manually imported connection does not. A manually configured profile may instead be the required method for a university or workplace. Use the service owner’s instructions to decide, rather than installing several clients and hoping one will interpret the configuration.
| Your requirement | Starting point | Important boundary |
|---|---|---|
| Access to an employer’s private service | Administrator-issued client and configuration | A consumer subscription does not replace authorization |
| Commercial VPN on a personal desktop | Provider’s supported Linux app | Check release, desktop and package support |
| A supplied manual profile | Compatible NetworkManager integration | App-only features may not transfer |
| Hosting your own VPN endpoint | A separate server deployment plan | This desktop-client guide does not open an inbound service |
Record your Ubuntu version and desktop before downloading anything. A guide aimed at GNOME is not automatically a guide for a minimal Ubuntu Server installation. If this is a managed computer, confirm that you may install software and alter networking. Preserve the current approved connection until a replacement has been reviewed.
Use GNOME’s network panel for a supplied profile
GNOME’s current help says to obtain the connection details and required client type from the VPN operator. A compatible NetworkManager package may be needed. Its desktop sequence is to find Network through Activities, add a connection with the plus control beside VPN, choose the connection type, enter the supplied details and save. Connection and disconnection are then available from the system menu; settings can be reviewed in the Network panel.
Use that as a navigation outline, not a source of invented values. The gateway, authentication method, certificates and any profile file must come from the actual operator. If the expected connection type is missing, investigate the supported integration rather than choosing a similarly named protocol. Do not paste a private configuration, password or client key into a public support forum. A screenshot can also expose those details.
For a workplace connection, the useful support question is specific: “Which Ubuntu release and client package do you support, and is my supplied profile intended for that client?” That question resolves more uncertainty than a generic report that Linux VPN settings are broken. Ask whether private-name resolution and access routes are included in the configuration or require another approved component.
A provider application example: Proton VPN
Proton’s current Debian/Ubuntu instructions support the latest stable distributions with GNOME and distinguish them from Ubuntu Server and unofficial derivative environments. The instructions describe installing the repository configuration package, then the native desktop package; they also say the GUI and CLI cannot run simultaneously. This is a provider-specific workflow, not a universal package recipe.
Follow the current official sequence when you install, including its integrity information, rather than copying a release-package filename from an old blog. Repository setup changes the machine’s software sources, so understand which source is being added. We deliberately do not freeze a download filename or checksum here: an accurate value for one release can become a misleading installation instruction later.
If you already have an account, establish whether its available features meet your requirement before upgrading. Our Proton VPN assessment discusses free-versus-paid scope. The inherited offers below are optional commercial records, not a requirement for creating a workplace connection or a claim that the setup was tested by VPNBlade.
Package convenience can change feature availability
Proton’s broader Linux support page distinguishes its native packages from Snap and third-party Flatpak distribution. It currently lists Snap limitations affecting advanced protocol features, split tunneling and ARM support, and warns of possible connection issues on Ubuntu 24 or earlier. Treat those as that provider’s current package qualifications, not evidence that Ubuntu itself is universally incompatible with VPNs.
The practical comparison is therefore between the exact package and the feature you need. A convenient install button is useful, but it is not proof that a routing feature is present. Conversely, a command-line installation is not automatically more private. Write a short requirement such as “supported native package with the documented routing control” and verify that requirement against the current release notes before changing a working setup.
Verify the intended job after connecting
A connection indicator is an initial status signal. Next, check the task that motivated the installation: does the approved private resource load, does the expected application use the intended route, and do ordinary websites still resolve? Our VPN verification guide explains why an address change alone is not a complete privacy test.
Use a small check sheet with the time, network type, client version, connection name and the exact failure. Separate an authentication error from a website that refuses a VPN address. Separate a private name that does not resolve from an application login failure. These distinctions help the operator investigate the right layer without asking you to make a series of unrelated system changes.
Troubleshoot one layer at a time
First establish that the underlying connection works. Then review credentials and the supported client/profile combination. If the tunnel connects but a particular resource fails, record that narrower symptom. Do not remove certificates, disable the firewall or delete network profiles as a general experiment. Those actions can affect approved access and make the original problem harder to reproduce.
Also understand intentional disconnection blocking before uninstalling an application. A kill switch may be designed to prevent ordinary access without the tunnel. Use the provider’s documented recovery guidance for the exact installed client, or ask its support team. Removing an application is a different action from temporarily disconnecting a session, and a successful removal does not itself prove the intended network policy has been restored.
Keep the configuration source, support contact and the results of your checks together. You then have a repeatable setup record for an update or a replacement machine. The useful endpoint is a supported connection that performs its intended task with understood limits, rather than an installation completed solely because a package manager reported success.
Cover: AI-generated editorial illustration, not a customer, product screenshot or evidence of testing.
YOUR EXPERIENCE MATTERS
Was this article useful?
Genuine reader helpfulness ratings. These do not measure VPN performance or verify a purchase. Only moderated submissions count. Ratings may reflect earlier versions of this information.